When you practice painting trees, begin by studying the bare outlines of winter trees (deciduous), because you can better see their whole structure and their proportions. In general, the proportions of a tree can be divided into thirds: one third trunk, one third branches, one third twigs. This principle may not always apply, but it gives you a helpful place to start. Observe whether the tree exhibits a single vertical trunk or multiple trunks; a twisted and contorted trunk, possibly weeping branches, or angular or smooth-flowing branches. Very few trees are symmetrical.
Use a round brush to paint the main trunk and thicker branches, then a rigger to paint thinner branches or twigs. (A palette knife or liner can also be useful for painting small twigs.) Alternatively and more simply, you can scumble in the smallest branches of a winter tree with a light tone to suggest the smallest growth. For a winter tree, work from the bottom upwards. Establish the trunk and main branches boldly; then begin to “suggest” a few smaller branches before rendering a light tone (by scumbling or dry brushing) for the fuzzy tiny twigs.


The complicated outlines of trees in leaf can be overwhelming without SIMPLIFICATION. It is important to remember that the same basic structure as is there in winter still lies beneath the cloak of foliage. You should paint the foliage as several large masses, varying them in size and making the shapes interesting, while also leaving rough edges; nevertheless, each should have three dimensions. Some masses should overlap others, but leave gaps between some to form important sky holes. Paint branches and twigs in these sky holes, NOT on top of the foliage shapes (Lost and Found). You should not paint individual leaves. Definitely do not paint detail you cannot see from a distance.
In general, when painting foliage, prepare a wash for the lighter areas and another, stronger wash for the darker spots. (You have the option of using even more color layers to increase color and tone variations.) If you apply the first light wash in a series of quick strokes with the side of your brush, the resulting shape will tend to look more spontaneous than overworked. Then, before the first layer of color dries, drop in some of the darker wash to correspond to the darker, shaded areas you have observed. You must remember to leave random sky holes. For trees in leaf, begin your painting with the foliage; then add trunks and branches. Tops of trees (facing the light) will usually be the lightest areas.

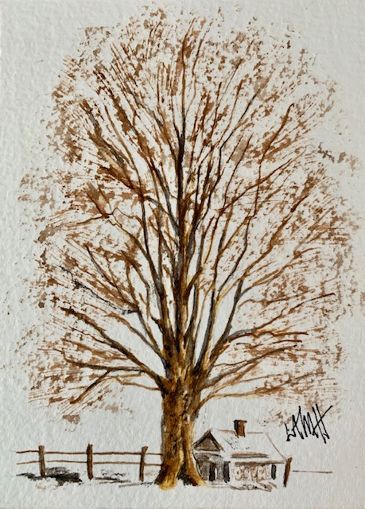
Very thorough tree demonstration. So many people draw trees without seeing what structure is beneath the leaves. Also, I especially like your autumnal tree (last one), did you use, New Gamboge, or Quin Gold? Nickle Azo Yellow? Or am I wrong on all counts? Anyway, a lovely tree lesson, thanks.:)
LikeLike
Thank you for your very positive comment on the second installment of the ‘trees’ blog post!
I really am not sure what colors I used when painting the autumn tree. I do know that it was done BEFORE I changed some of the colors on my palette,
so I probably would use different pigments if I painted it today. I believe I
started with an underlayer of cadmium yellow for all leaves. Then, it looks like I mixed cad. yellow and cad. red to make an orange and used that mix to add shape and shadows. (I would think you could use burnt sienna instead of or in addition to the orange shadowing; although it would be slightly different, it could add another layer and increase depth and volume even more.)
Thanks again for your comment! Lee
LikeLike
Well I’m sure you mixed those colors yourself and they worked beautifully. You’re a great inspiration! Have a nice weekend.:)
LikeLike