Getting outdoors and painting directly from nature can be very enjoyable. You get a feel for your surroundings – colors, smells, temperature, atmosphere, light, and so on. Sometimes, however, you need more time to work on your painting than you have at the moment: the weather may not cooperate (it begins to rain, or the temperature dips below freezing), the light changes quickly (the sun goes down, or clouds emerge), or other circumstances change (the birds you are painting fly away, or ripples disturb the water). For these reasons, painting with the aid of photographs is often much more convenient and can increase the amount of time you can spend painting a scene.
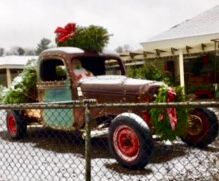

Christmas tree truck photo references.
Dangers do emerge, however, when you are working from photographs, particularly if you use pictures taken by someone else. As an artist, you need to make sure that the photos on which you plan to base a painting are not copyrighted by the photographer. Photos do belong to the picture-taker. As a solution, you might ask the photographer for permission to use them. Also, you might try a Google search (“Advanced Image Search”) and look in the “Usage Rights” section for content labeled either “Creative Commons” or “Public Domain.” Alternatively, visit some internet sites that offer stock or copyright-free photos. (I will include a list of some of these sites in next week’s blog.)
TAKE YOUR OWN PHOTOS.
Taking your own reference photos, however, is an even better approach. You can think of your camera as a sketchbook, using it to compose pictures while you look through your viewfinder. Each picture will belong to you, whether you combine it with a similar shot, crop and simplify the image, or make color changes as you paint. Keep in mind, however, that photographs DO NOT reproduce an image in the same way that the eye sees it. The camera tends to lose details in shadows and overexpose bright spots. Photographs can also change actual colors in a scene and provide too much detail. While your photograph can provide some excellent information (for example, architectural details, lighting conditions, and color references), the camera is simply a TOOL like any other tool (like a paintbrush or painting paper), and your eye and judgment as an artist must guide the use of any such tool. Use photos not as ends in themselves but simply as sources of reference information.
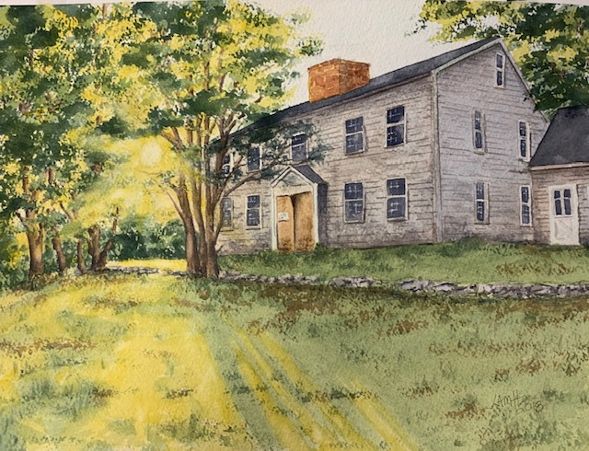
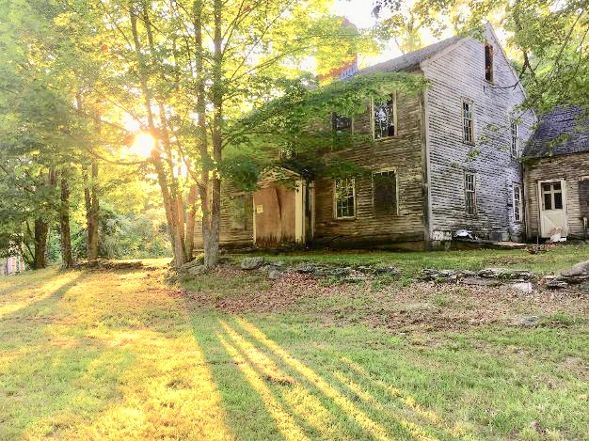
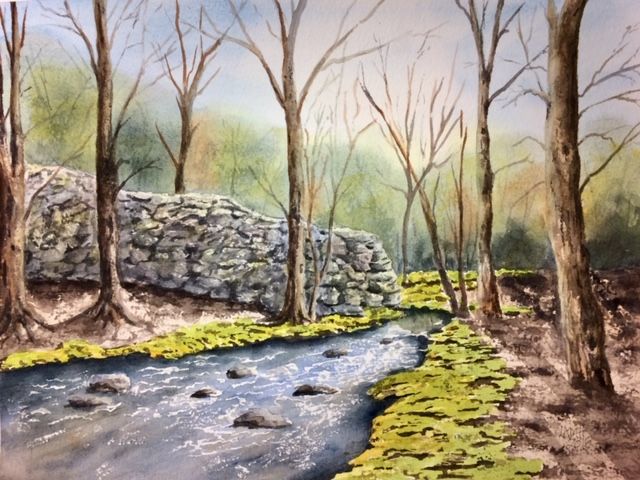
Watercolor “Pepperell Relic”, with photo reference.
Sometimes when you focus a lot of energy on taking photos, you may not take the time you need to study your subject and look at it with careful attention. Sketching or drawing that subject, on the other hand, can force you to “see” what you are looking at, noticing the truly important information.
IMPROVE ON YOUR PHOTO REFERENCE.
Your goal should not be to paint an exact copy of any photograph; instead, you should simplify the scene. Your job is to improve on a photo, adding your own personality and flair, expressing your excitement or the mystery you feel when viewing that scene. What attracts you to the subject in the first place? Take time before painting to look at your photo and think about what you might want to change in it. Some elements in the photo might seem unnecessary or distracting. You might be able to improve the composition or color.
If someone tells you that your painting looks like a photograph, don’t take that statement as a compliment. The implication is that you have actually copied the photograph rather than using it for inspiration or information. Do not attempt to include every detail from a photo in your painting. Simplify; focus on your interpretation of the center of interest, and try to be creative.
You will get more out of your photographs if you use them as a starting point for your painting rather than as the desired end result. You will often need to make some changes from the photo to turn it into a good painting. The first type of editing of a photo is to make SIMPLE COSMETIC CHANGES while keeping the essential image intact, and many types of these cosmetic changes can improve your picture. For instance, your photo may show dull, boring clouds that need some added drama. You could also decide to reinterpret and brighten colors to produce an exciting or ominous mood. You could tilt or angle your image for a somewhat different point of view. Some artists who flip the image in the photo (as in a mirror) find that that change improves the way the viewer’s eye moves through the picture. One of the simplest changes to make is a change in season. Another cosmetic change you could make is altering the time of day (and thus the mood) by changing the light and altering shadows.
By manipulating values, detail, and the quality of colors, you could create a warm, sunny picture or a soft, foggy image . . . or anything in between. Similarly, you could add more shadows to add interest and visual pattern. If a photograph does not show enough value contrast, you can create that contrast; sometimes, by simply changing the light direction, you can lighten some areas and darken others. You can highlight important areas by making them light and by surrounding these light areas with dark colors (thereby increasing contrast around your center of interest). You don’t have to use the colors you see in a photograph; you can increase color harmony in your painting by limiting the number of colors you use. Alternatively, emphasize both warm and cool colors for contrast and interest. You could make some exciting variations of color in an area that is basically one color by mingling other colors to add life.
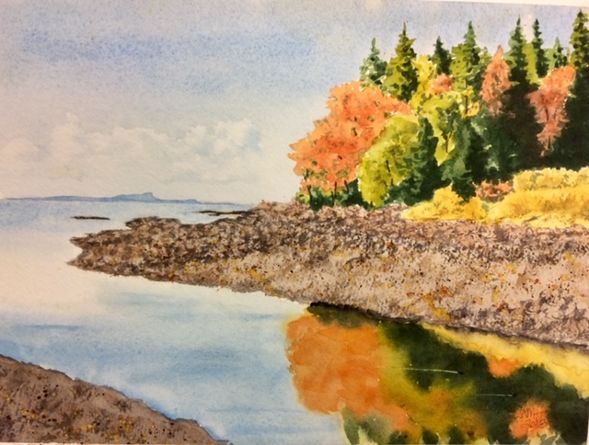
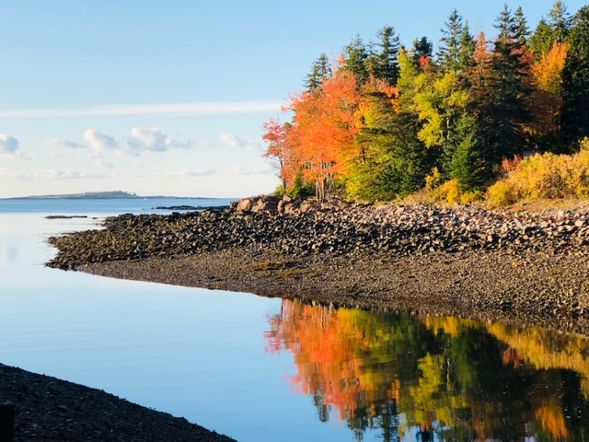
Watercolor “Maine coastline”, with photo reference.
Another type of edit to improve a photograph for painting is making a STRUCTURAL CHANGE to improve the composition and to build a picture that is more your own creation. You can make changes to what is in the photo and to where things are in your picture. First, evaluate your image to identify the most important object or the focus of attention. Notice the big SHAPES, major LINES, and VALUES. You’ll want to decide what to keep and what to eliminate from the photo. Don’t keep anything that is irrelevant. Keep in mind your knowledge of good composition (see my blog “Making a Strong Painting with Good Composition” from October 16, 2018, or review your favorite art books on the subject of composition and design).
Cropping a photo and zooming in for close-ups allow you to relocate the center of interest to a more dynamic position, thus improving your composition. You could also highlight your center of interest by changing your format or the orientation of your paper. For example, a landscape orientation may be appropriate for focusing on a farmstead with surrounding fields whereas a portrait orientation could highlight the magnificent tree in front of a farmhouse; on the other hand, a square format could work well with a flock of sheep grazing in a field, while an elongated format could effectively fit a vista of the mountains that provides the backdrop for the farmstead. Exaggerating some details or colors can also improve a composition. Similarly, you could change your point of view; try changing the level or angle from which you are viewing the subject, imagining, for instance, that you are looking down at the same scene from a plane flying overhead. If your photo has been taken from the shore of a lake, would the painting be more majestic if you imagined the lake viewed from the edge of a cliff above it? Use your imagination!
A third way of editing photographs for painting is making CREATIVE CHANGES; this technique can be quite dramatic. You can add elements that are not in the photo or combine parts of several photographs to create a new image. Birds from several photos can be put into one. Flowers can be rearranged. To a wintry field you can add skaters on an icy pond. You can paint two different types of images together, combining an image of a wilderness lake with the image of a map showing how to get there. The sizes of elements within a picture you can also alter; if the photo shows five trees of the same size, try making one the focus of attention by making it bigger while also varying the size and spacing of the others to support the dominance of the larger tree. You can overlap images, fading one out as it joins another, and, of course, you can even produce an image that is pure fantasy.
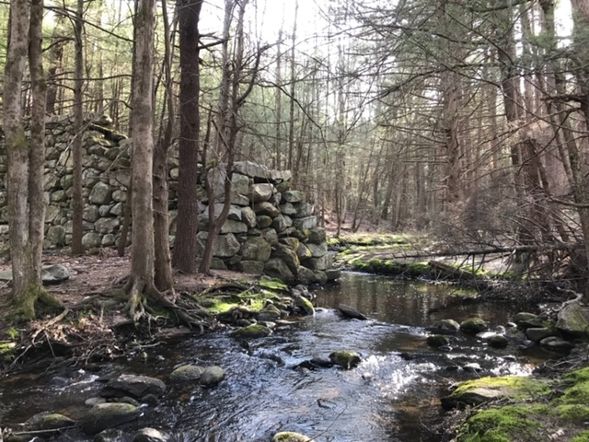
Watercolor “Mulpus”, with photo reference.
While you can paint from a photograph, painting on site is preferable because that way, you can view, experience, and even sketch the scene for yourself. Using other people’s photographs involves some dangers, particularly if you don’t have permission to use them. Furthermore, photos tend to distort and change some of the information they capture, in addition to including too much detail for a good composition. If you take your own photo, you can use it for lighting conditions, architectural details, and further inspiration. However, photographs can never tell you the full story, even though they can be helpful references. You can (and should) edit a photo to improve and simplify its image. Crop your photos, and combine them as needed to create effective, powerful paintings.
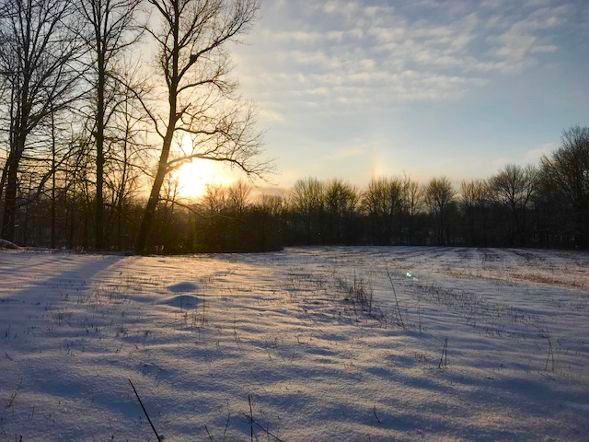
Photo reference for future watercolor.

1 Comment