The most useful tools are often the most simple and easiest to use!
Several of you have recently asked how to transfer an image to your watercolor paper when you have no graphite tracing paper or already enlarged template to trace. Here is a simple way to accurately transfer your image.
The grid system of drawing or transferring an image to paper (or other painting surface) has been used for centuries by many artists, including Leonardo da Vinci and Albrecht Durer. It is a low-tech, inexpensive tool used to reproduce, decrease, or enlarge an image.
Overview.
Draw a grid of lines over a reference photo, then lightly draw a larger grid (of equal ratio) on your work surface. To calculate the size of the second grid, work backwards from the desired final size of your drawing.
Method. Draw first grid and label.
To use this method, you will need watercolor paper, ruler, pencil, pen, and eraser. Try to work from a black-and-white original image. Draw a grid with pen (so it’s easier to see) directly on your black-and-white template image. You can decide arbitrarily on the size of the squares in the grid, but they must fit evenly on the image. For example, with a 5X6” image you might draw 1” squares – 5 squares across and 6 squares down.

Example of grid over template, 4 squares across, 3 squares down.
When the squares are drawn on your template, LABEL the boxes on left and top, to help you keep your place as you proceed to transfer your image onto your watercolor paper (or other painting surface). You might label boxes down the SIDE with letters – A, B, C, etc. You might label boxes across the TOP with numbers -1, 2, 3, 4, etc. In this way, you keep track of the lines you are transferring from each box to its corresponding box on the second grid. In other words, if you are duplicating box E3 from your template, you will look to work on box E3 on your work surface.
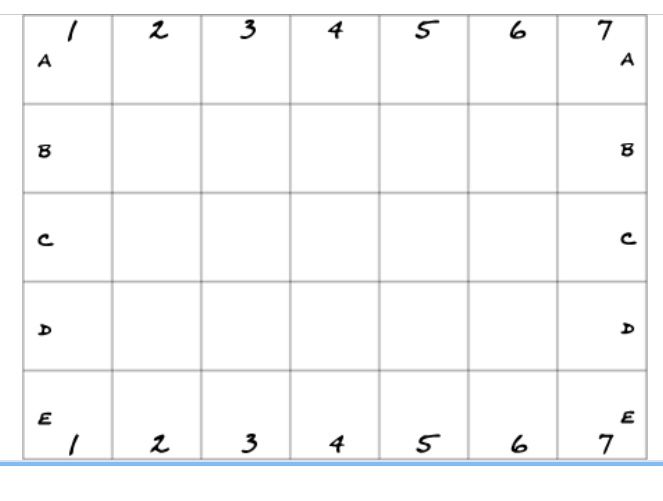
Labeled grid.
Figure and draw second grid, then label.
To create your second grid, determine the final size of the picture you want. Then you’ll need to make some calculations. Will you need to double the size of the original grid squares? Perhaps make them three times as large? What about making them on and a half times as large?
Measure and lightly draw the outer rectangle (or square, whatever your shape) for your final image. Use your ruler to determine the new size of the grid. You want the same number of squares in your second grid (not the same size as the original unless your final image will actually be the same size as your template), with the SAME RATIO of width to length. So, what size squares will fit EVENLY within your rectangle? For simplicity’s sake, let’s decide your final image will be 10’X12”. This would make 2” grid squares a good choice. Lightly draw out your final grid with PENCIL on your paper, and LABEL the new grid in a way similar to the original grid, e.g. with letters down the side and numbers across the top.
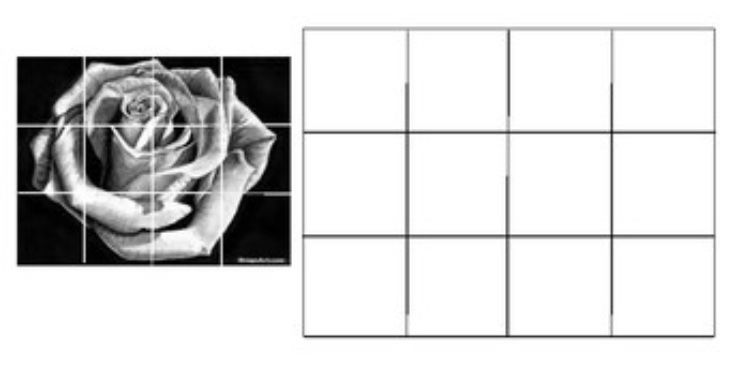
Example of original grid, and enlarged second grid with same proportions.
Then, square by square, transfer the same line details to the second grid, one square at a time. Follow the details, from box to box. You look at where the lines start and progress, say in square E3, and approximate the same line placement. Your aim is to recreate similar lines you “see” WITHOUT interpreting and drawing what you think you see.
Get the large shapes penciled in, then begin adding some details. Keep looking at grid labels to keep your place and check placement. When your drawing is finished, check it over. Catch any mistakes now! Smooth out lines in your image and erase grid lines as carefully as well as you can, without damaging your watercolor paper. Then, it’s time to paint!
A final lesson.
Using the grid method encourages the artist to draw what is there without struggling with concepts of how things “should” look. While the grid might seem to be a constraint, it, in fact, liberates the artist from making unintended misperceptions relating to the way they think something looks. See my related blog posts:
Painting Begins With Looking and Seeing…, published 12/18/18, https://leemuirhaman.com/2018/12/18/painting-begins-with-looking-and-seeing/ ,
Avoid Painting Lollipop Trees! (Parts I, II, and III), posted 3/13/19, 3/19/19, and 3/26/19, https://leemuirhaman.com/2019/03/13/avoid-painting-lollipop-trees/ , https://leemuirhaman.com/2019/03/19/avoid-painting-lollipop-trees-part-ii/ , https://leemuirhaman.com/2019/03/26/avoid-painting-lollipop-trees-part-iii/ .
In summary, the grid prevents an artist from changing or misinterpreting important information. A grid can help you measure relative proportions to sidestep any distortions. And, finally, the grid also insures that you observe and take into account necessary constant vertical and horizontal references.
In the next blog post, let’s move beyond the grid method to learn HOW TO DRAW and to transfer perspective and proportion using just a pencil, as a moveable, low-tech “grid” for drawing, perfect for using out doors. The method allows you to transfer what you see without any template. Keep watch!
I’ve got a newsletter! Join me and get painting tips, inspiration, the latest news about classes, new art or products for sale. Subscribe here. I’ll give you a free copy of my Color Blending Tips pdf., that you can download and print.

1 Comment