As you know, many artists, including me, want to get on to their painting quickly. Unfortunately, jumping right into a painting without forethought often develops into rushing and inattentiveness to important details. It can be a disaster to encounter a problem with the arrangement of shapes, or discover something in your picture you want to change, while in the midst of painting. Don’t simply copy, without thinking, all the details you see before you while emphasizing them all equally! Instead, take the time to contemplate a plan before starting to paint! Rein in your excitement, for the moment, and harness your enthusiasm. As an artist, strive to simplify, interpret a scene, and make it your own. How?
Create thumbnails.
Use several THUMBNAIL sketches to structure the best possible composition for a painting. Thumbnails are not finished drawings, but quick, small, simplified sketches, 2X3 inches (or perhaps 4X5 inches) that help you explore where your painting might go. Try to keep your thumbnail sketch proportions similar to what you plan for the finished work. Experiment with the arrangement of shapes and values. Your first thumbnail is often not the best arrangement you can come up with, so draw several thumbnails, with pencil, before choosing a final composition.
Sketching out a few thumbnails is like brainstorming, investigating options or variations on possible arrangements. It need only take 3 to 5 minutes. By working small, there is no room to fuss with detail. It is one of the best ways to organize and simplify a composition, and to focus on important information, while eliminating the unnecessary.
Attention to your thumbnails will save you both time and creative energy. If performed with conscious attention and thought, you will discover the strengths and weaknesses of your composition. Does your image work best in a horizontal or vertical format? Should you crop out part of your image to emphasize a terrific grouping of shapes? What will the focal point be? Where is the light coming from? Does the picture need more contrast to emphasize the center of interest? Maybe it would be better to eliminate some of the more distracting elements. What about rearranging some shapes to lead the viewer more easily into the picture?
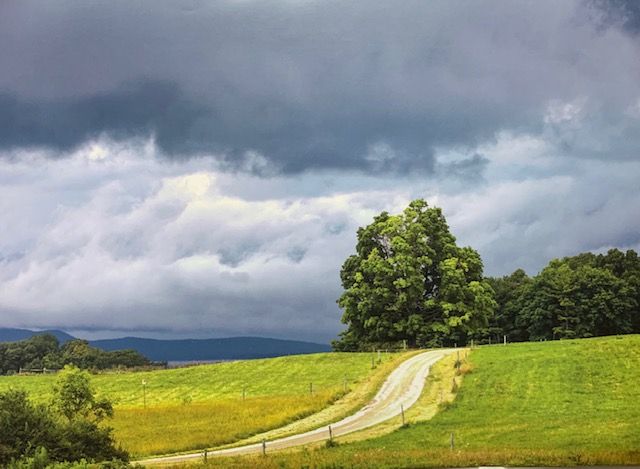
Recent reference photo.
Look for the BIG SHAPES and VALUES.
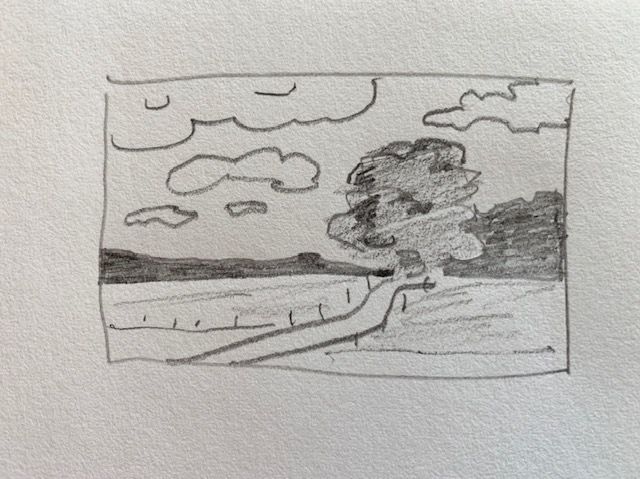
Thumbnail 1 – sunny sky, remove corner vegetation, larger tree?
Shapes are the building blocks of composition. To create a thumbnail, sketch the LARGE SHAPES first, forget about small details. Group masses of similar value shapes together. Sketch lightly at first. Identify the most important objects or parts of the scene. Notice how the smaller shapes relate to the large shapes. Try to think of possible changes in the arrangement and STRUCTURE of elements that might produce a stronger composition. You may want to rearrange some of the major shapes or change their size or profile.
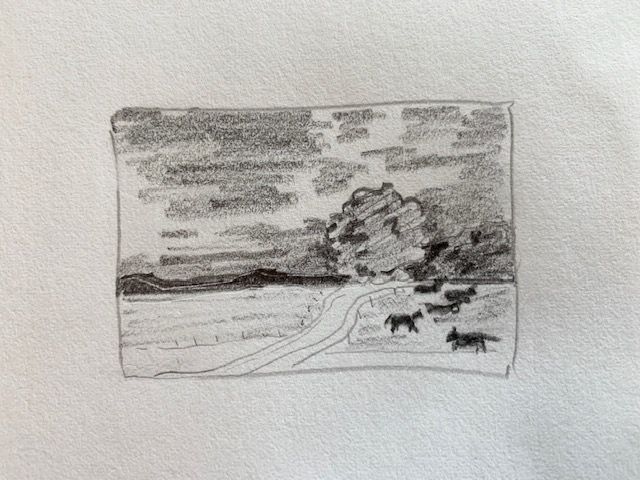
Thumbnail 2 – add animals, remove corner vegetation?
Refine your shapes, then start to add VALUES to your sketch. Squint to identify the darks, mediums, and lights. Each mass of shapes needs to be lighter or darker than what is next to it in order for it to appear different. Consider changing the value of an area if it improves value contrast and the composition. Stick to dark, medium, and light values in each sketch to keep it simple.

Thumbnail 3 – More sky, less field?
Add or rearrange to explore variations in value or even subject arrangement or EMPHASIS. If you do change values, however, realize that you have changed the light source and must also remember to check that any shadows are consistent with this new light source. Add darker lines and middle values.
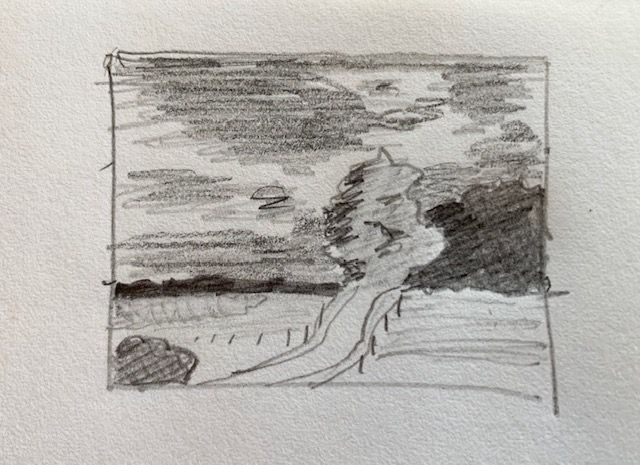
Thumbnail 4 – enlarge tree, minimize/lighten left corner vegetation, darken right side trees, darken clouds behind center tree, keep fields/road light – values exaggerated!
Finish by shading in the darkest values and adjusting CONTRASTS between shapes. Remember, the greatest contrast in values (and sometimes the lightest value) is centered on the focal point.
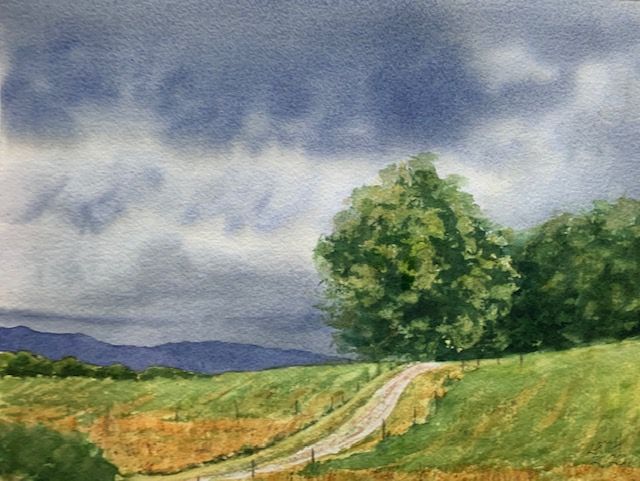
Finished watercolor painting.
In my latest painting (shown here), I WISH I had sketched thumbnails BEFORE I painted! I know I should, but I don’t always do it. This time, I didn’t, and I struggled. I couldn’t figure out why the painting initially wasn’t working. The subject was good, but eventually I realized I had to increase the value contrasts – a lot. Nothing stood out until I lightened some areas and darkened others! So, I wrote this post and created these thumbnails after I had trouble with getting the values right while painting. I ‘shut the barn door after the horse was gone’! Maybe this article can help you realize how drawing quick thumbnails (before you paint) will help you work out possible problems ( with composition, subject, color, etc.) before you start painting. The time you spend creating thumbnails can save you some headaches.
To summarize,
With the knowledge learned from thumbnails, you can begin painting with much more confidence. It’ll be a cinch! You will have considered the main STRUCTURE, EMPHASIS, SHAPES, and CONTRASTS for the composition. You will have already worked out most of the possible issues and problems within your thumbnail sketches. You will have developed a ‘plan’ for your composition, since you understand that it is the strength of the composition NOT the subject matter that makes a painting effective. The plan may even include possible color choices. Don’t forget, however, when transferring your image to the watercolor paper, to refer back to your thumbnail, not necessarily your reference. This would insure any changes made when creating your thumbnails are included when transferring the drawing onto paper. Save your reference for later, when you start to build up detail in the final painting.
Join me and get painting tips, inspiration, the latest news about classes, new art or products for sale, sent to you in my newsletter. Subscribe here. I’ll give you a free copy of my Color Blending Tips pdf., that you can download and print.

2 Comments